Showing posts with label Craft. Show all posts

Saturday, June 23, 2012

Batik

Batik:


A method of dyeing a fabric by which the parts of the fabric not intended to be dyed are covered with removable wax


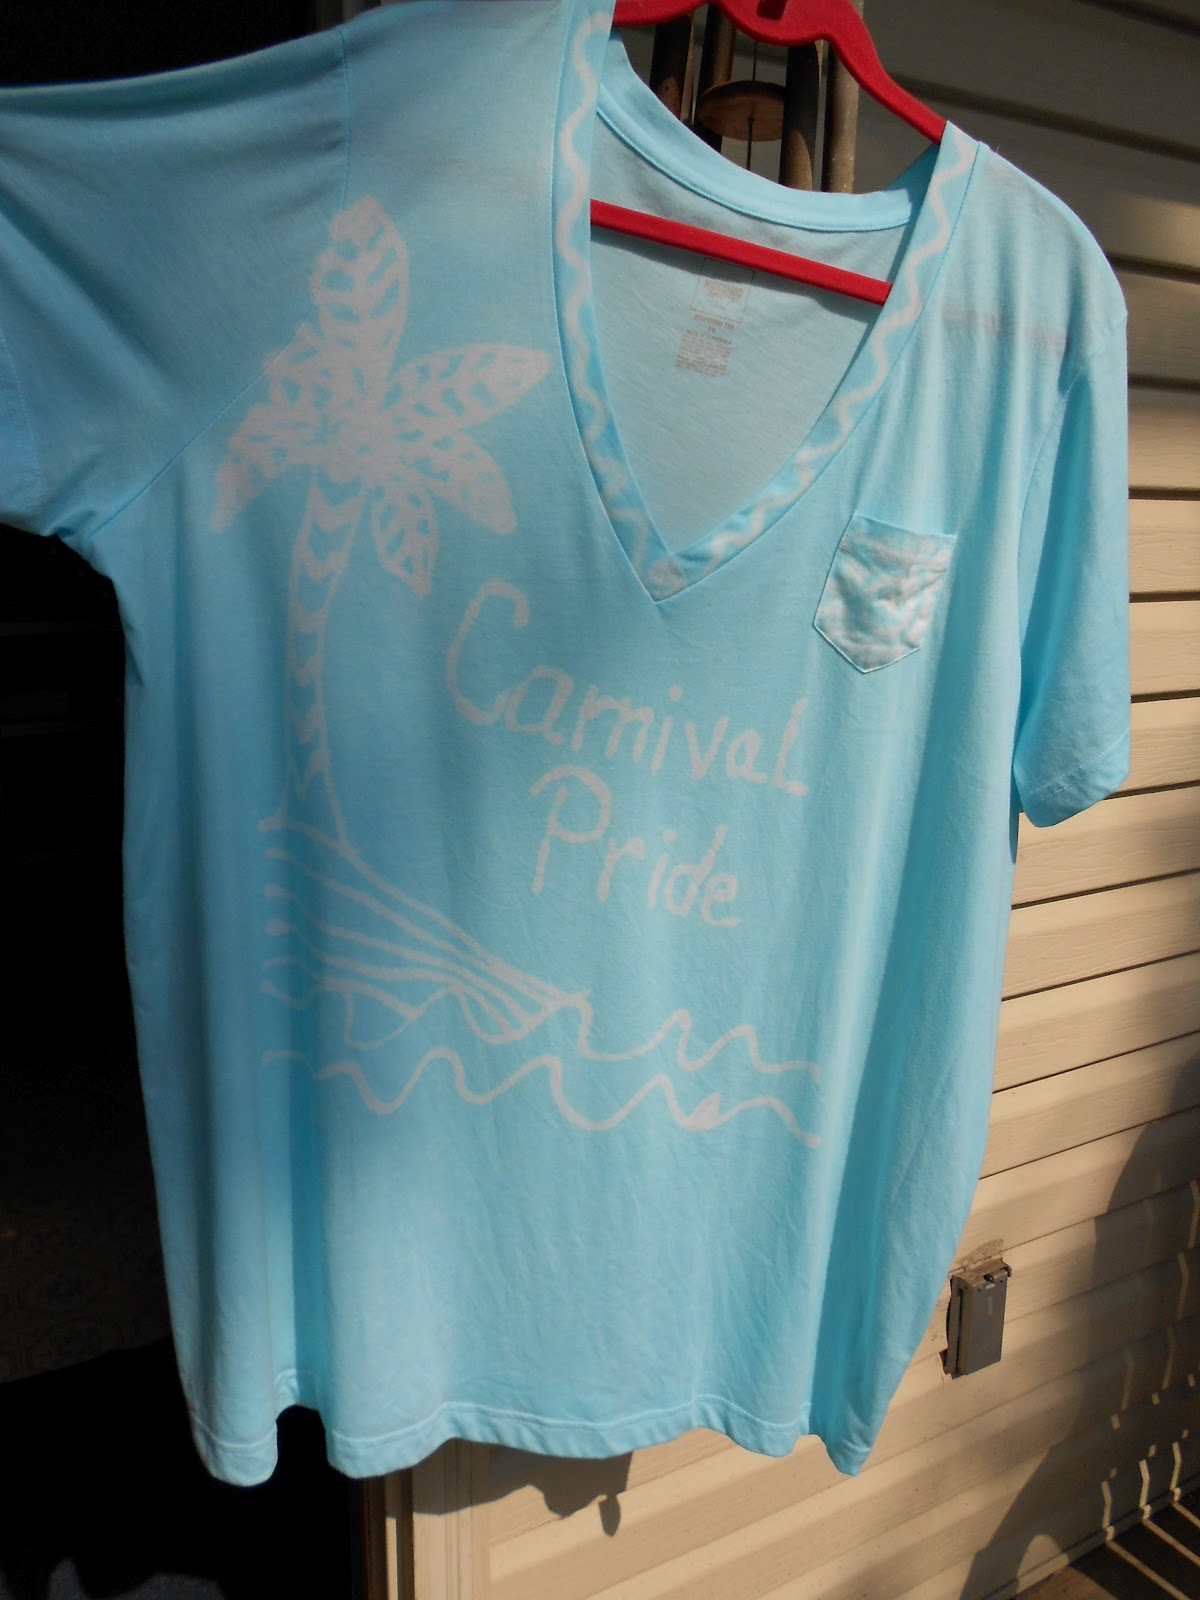
While on pinterest the other day I saw a technique of batik using blue elmer's glue!

I started at Target and purchased a white 100% cotton T-shirt to dye.  The glue actually took 3 stores, but I did find it a Joann’s where I also purchased the RIT dye.

  1. 1.       First step is to find a place to lay the shirt out that will not be disturbed for a few hours.
  2. 2.       Create or find something to put between the layers of fabric if you are doing a shirt or skirt.  I used a    plastic tote lid for my shirt.
  3. 3.       Wet the material and slide the protector between the layers and smooth out.
  4. 4.       Create your design. I went with large and simple for a first attempt.
  5. 5.       Let dry for several hours.
  6. 6.       In a large container, I used a large stock pot. Mix 1 bottle of RIT liquid dye with 1 cup salt, stir to dissolve.
  7. 7.      submerge the dried shirt into the dye and stir often. I left mine in for 1 hour, longer for a darker color.
  8. 8.       Once done, rinse in the sink with some dish soap to wash out the glue, then wash on cold in the washer.
  9. 9.       I hung mine to dry! Pics to follow!!!


Saturday, April 7, 2012

Easter Crafting

I am in the mood to be creative, and what better time than spring and Easter to do some fun stuff!

First I made my centerpiece for the buffet table. The best part was that the whole things was made with stuff I already had around the house!


I especially love the cat grass and mini daffodils...  The little vases are actually votive candle holders that I topped with some scrapbook ribbon. 

My second project today was bunny cookies! I saw these really cute cookies on Pinterest, from a blog called  "It's written on the wall". I was told by my niece that mine look like mice, but I'm ok with that!


Super yummy! I used a small egg cookie cutter and royal icing...... 

More to come!!

Friday, March 30, 2012

Natural dyed Easter eggs..

I am seeing a lot of posts on dying Easter eggs with natural dyes apposed to the artificial dyes sold in the stores.  As I was reading I realized that I already knew how to make the most beautiful maroon colored eggs using onion peels and have been doing it for years now!

Way back in my college days I spent a couple of Easters with my bff Susan and her family.  Her mom would make these amazing eggs by boiling them with onion peels.  I was truly awe struck at the simplicity of the technique, yet the complexity of the color that was created.  Years later I started making them myself and have worked out a system that works pretty good.

It all starts for me the week after Easter when I start to save my egg skins.  Now, I have read that you can get color variations by using different colored skins, like keeping the red skins separate from the yellow. But I like just putting them all together.  I store them in a gallon size zip top bag left open in my pantry.  Every time I  get an onion out to cook with, I save the skin.  I leave the bag open so that if any of the peels have moisture on them, I won't get mold.  By the next year I have a pretty full bag and am ready to make the dye.


In a medium size pot I put about 1/2 cup of vinegar, the bag of peels and enough water to cover.  Boil over medium heat for about 30 to 45 minutes. Then cover and cool.


Once cooled you will have this amber colored dye to use on eggs, or just about anything I would imagine.  

I poured my dye back in the pot and stored it in the fridge until I was ready to color my eggs.  

Once ready, place the eggs in the pot and boil. If you do not have enough dye to cover the amount of eggs you are coloring, you can add more water. Boil as you would normally do to cook an egg, but watch for the color change. If you want to get a darker color, try leaving the eggs in the dye once cooked.


If you notice the color variation I have, it is because I left some skins in the pot. I happen to like them rustic looking. However, if you want to go for a more solid color, strain the dye of all the skins before you boil.

Another style I have seen is to take small greenery and stick it to the eggs before dying. You can also use a white crayon, wax, or stickers even to achieve the same effect. 

As a side bonus, the eggs seem to pick up an onionish taste from the dye.  I love them!

Happy dying!  

Wednesday, February 22, 2012

Crafty


Yesterday I made a quick and easy project for my niece.  She loves pink and sparkly therefore, this was a great fit!

Materials:

5x7 recycled picture frame
small piece of fabric
rhinestones
craft glue

I decided to use her initial, but you can really do any design you like! I removed the glass, a) because I broke it, and b) because I don't think the sparkle will come through with it on. But that is a personal choice.  I then cut the fabric and taped it tightly onto the cardboard that was behind the glass. If you don't have cardboard, just cut a piece to use.  I then used a pencil to lightly draw in my design.  Next you add the glue and drop in the rhinestones!

She loves it, I love it and that is what matters!

Wednesday, October 5, 2011

No sew tutu

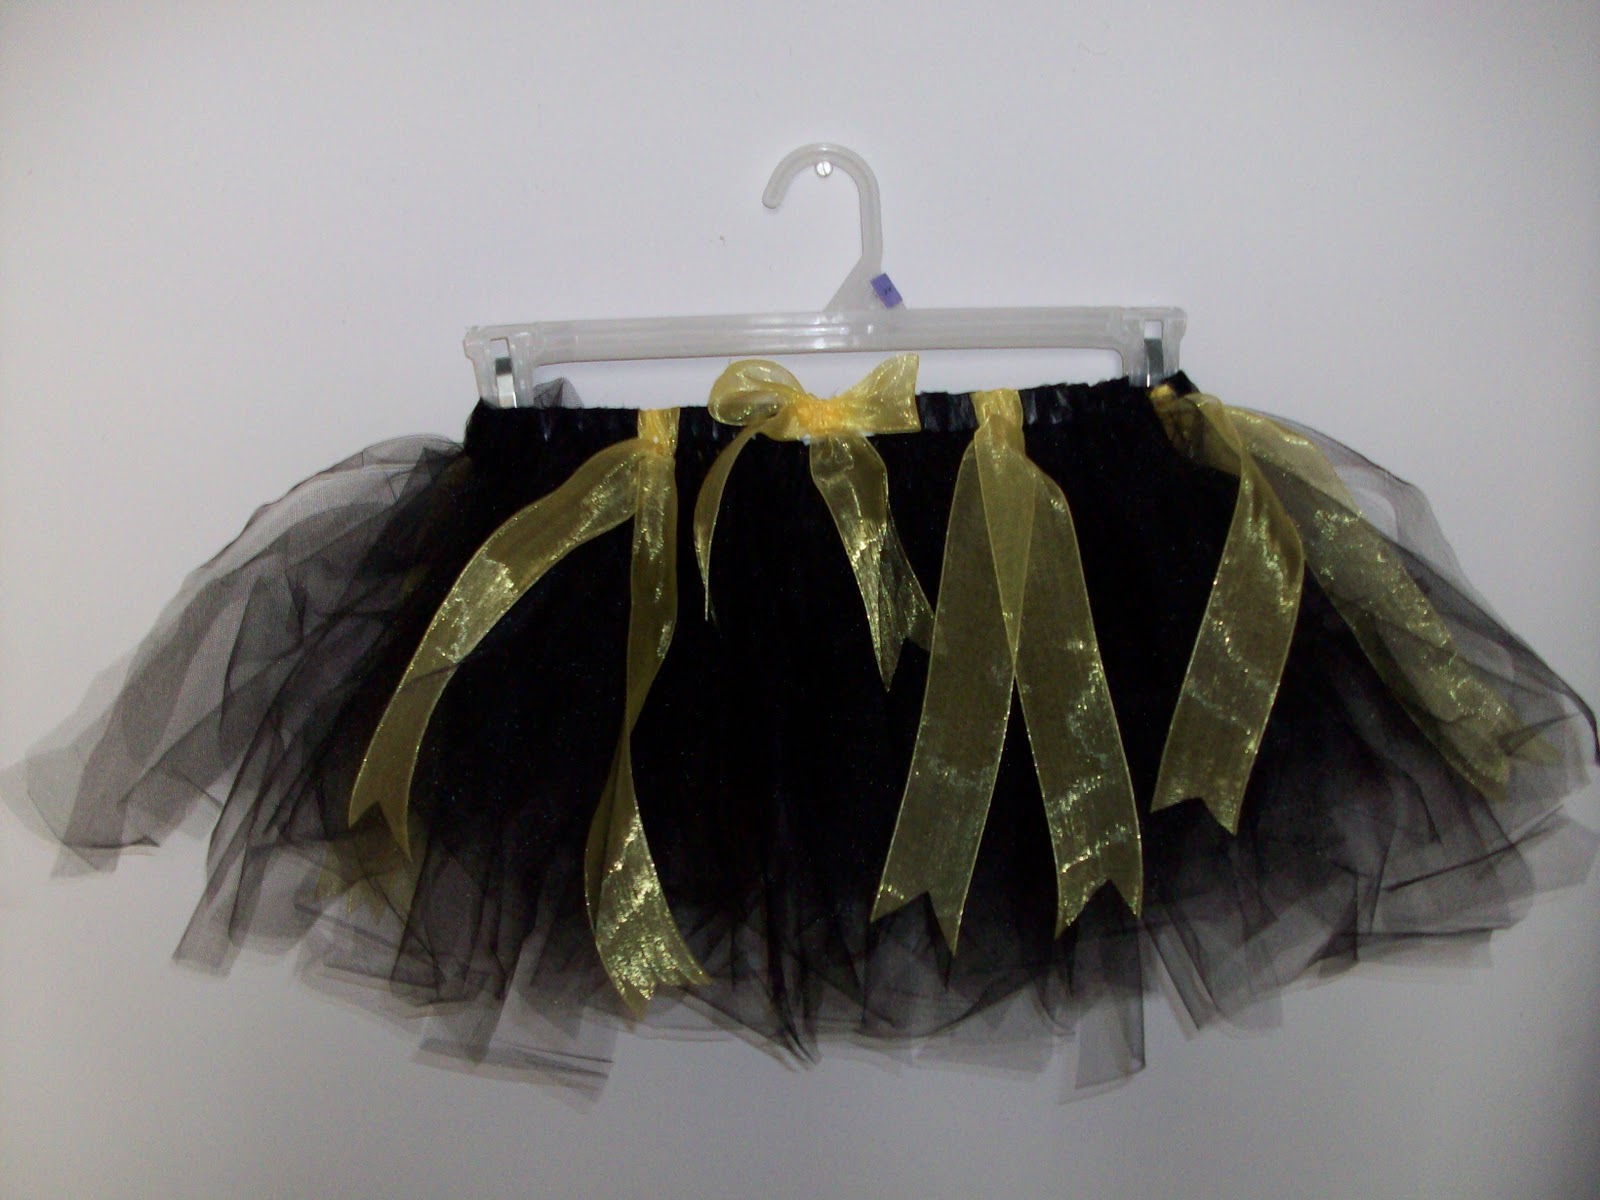
Thanks to a lovely gift of tulle from my sister in-law, I created a cute little tutu for my bedazzled cousin!  She is 4 and takes after me is so many ways. She loves all thing sparkly and glittery.  So of course I needed to make her a tutu.  Well, she loved it!

While visiting the other day, she shows me her Halloween costume, she is going to be a bumble bee.  Her mom asked if I could make her a matching tutu for that because the one on the costume is a bit anemic!


And so the bumble bee tutu was born.  

This also got me to thinking that I should make these for a craft fair I am going to in November.  My original plan was to make ginger bread cookies, homemade marshmallows, and maybe some other candy, but I am totally adding these to the mix. 

Tuesday, September 27, 2011

Recycle Project

ok I did it!  I turned 8 plastic shopping bags into a gift bag the size to hold one pint canning jar!


I removed all the colored panels from the bags first.  This left me with 8 small colored squares and 8 longer white sheets. I ironed the colored ones first.  Lesson 1, low low low iron setting and slowly move iron around the paper. If you leave it to long the plastic will melt to fast and you will get holes.  Lesson 2, expect a large amount of shrinkage. I started with 8 full bags, and finished with enough of the white to do 4 6x4 sides and a handle.  The colored piece I used a 4x4 for the bottom and will keep the rest for another bag.

This is my prototype, when I make more I will use other colors of plastic and recycled ribbons and such to decorate!  When all done this will be a 98% recycled gift!  The only new things will be the lids for the jars (sanitary reasons of course, and the contents of the jars!) I am very excited about this holiday gift project!!


Wonder what else I can create with this technique! 

Monday, September 26, 2011

Holiday Project

I'm thinking about the holidays already!  And yes, I usually start this early, but this year being unemployed it is more important.  One thought I had was to create some gifts.  I love giving gifts from the heart and can think of no better way than to create something with my hands!  So, while on the hunt I came across a project I am totally going to try.

I am posting a link to the youtube video, because there is really no need to recreate the wheel here.  The basic jist is that I will be taking plain old plastic shopping bags and fusing them together to create a fabric.  I will then cut and sew the fabric into gift bags that can double as shopping bags, or lunch bags!  For Christmas, I will be canning some tomato jam and maybe pumpkin butter and putting these in the bags!

http://www.youtube.com/watch?v=PNziDXtm1SA

My thought right now, because I haven't started yet and always have grand plans prior, is to use mostly white bags, and then cut up the colored bags and fuse the colors between the layers to create a custom "fabric"!

I of course will post pics later!