Wednesday, August 1, 2012

Cycling

I'm riding in Pelotonia… A ride to raise money for cancer research.  I have a lot of time to think while riding, and the thought came to me  this weekend that although I do ride with a team it feels pretty solo while out there.

I ride with Team Huntington, one team, one goal.. end cancer.  But, and maybe this is me, I don't feel a part of a team. Heck, I really don't feel like a cyclist either.  

We meet up, we set out on a predetermined path and then go.  Those who go faster will stop at the designated stops and wait.  Those of us who are slower meet them, we chat a minute and head out.  So yes, there is a team aspect, but it really doesn't feel so much like a team sport. 

During my rides, it's me, my thoughts, and depending on how I feel, my doubts.    This past Sunday during my 3 hour ride, my thoughts centered around the dichotomy of riding in a Peloton and yet feeling very alone.  I'm not sure that alone is the right feeling I want to convey, I wasn't sad or anything, it just struck me at that moment that I don't feel like a part of a team. I feel like someone out for a ride that meets up with folks along the way. 

While thinking on this topic, it struck me that I won't  see myself as part of this team because I don't like the idea of depending on others, or most importantly holding others back.  I ride at my pace, I am comfortable with that, I know I will get to the end in my time.  When I feel like someone is waiting on me, or I am slowing the pack down, I get stressed and try to go faster, in this case I burn out way before I should and then the ride loses its purpose for me.
So, I will ride as a solo rider in a field of 6000 and have to be ok with that.  

Saturday, June 23, 2012

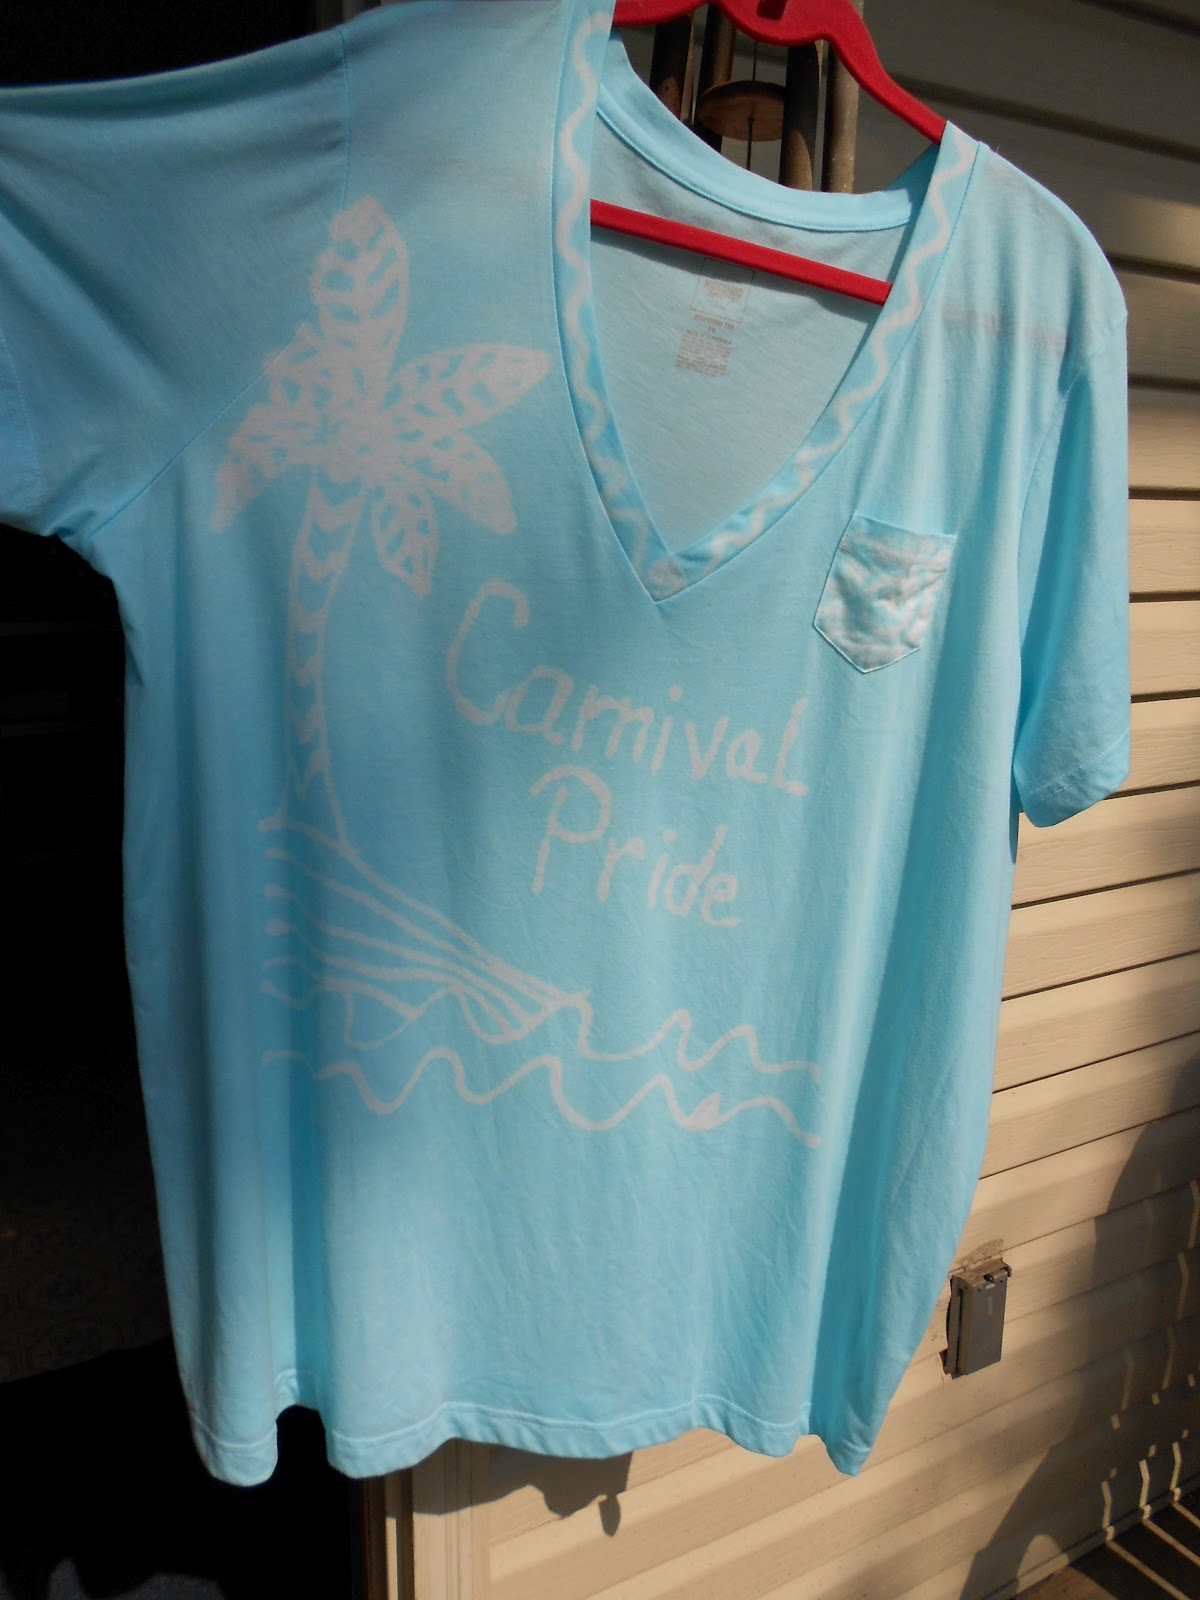
Batik

Batik:


A method of dyeing a fabric by which the parts of the fabric not intended to be dyed are covered with removable wax


While on pinterest the other day I saw a technique of batik using blue elmer's glue!

I started at Target and purchased a white 100% cotton T-shirt to dye.  The glue actually took 3 stores, but I did find it a Joann’s where I also purchased the RIT dye.

  1. 1.       First step is to find a place to lay the shirt out that will not be disturbed for a few hours.
  2. 2.       Create or find something to put between the layers of fabric if you are doing a shirt or skirt.  I used a    plastic tote lid for my shirt.
  3. 3.       Wet the material and slide the protector between the layers and smooth out.
  4. 4.       Create your design. I went with large and simple for a first attempt.
  5. 5.       Let dry for several hours.
  6. 6.       In a large container, I used a large stock pot. Mix 1 bottle of RIT liquid dye with 1 cup salt, stir to dissolve.
  7. 7.      submerge the dried shirt into the dye and stir often. I left mine in for 1 hour, longer for a darker color.
  8. 8.       Once done, rinse in the sink with some dish soap to wash out the glue, then wash on cold in the washer.
  9. 9.       I hung mine to dry! Pics to follow!!!


Sunday, June 3, 2012

Pork

<img src="http://img.bzzagent.com/image/porkInspired.jpg?Type=activity&Activity=0107056774&Campaign=5469470870&Uid=298519&token=91db5bde402def5d95545b50d394d8b0" alt=""/>

I had a new bzzagent campaign this month..... Pork!

I bought 4 large center cut chops and brined them in water, cider vinegar and salt.  I let them brine overnight for maximum flavor.  The next day I grilled them up, and let me tell you., juicy, tender and yummy!  I love pork and to find that it is a pretty healthy meat option is better!

Monday, April 23, 2012

Rainbow Cake

My little niece asked for a rainbow cake for her birthday.  Yes it was that simple, what can I say.. I'm soft when it comes to the little people in my life....!

I had read a few ideas of how to accomplish this, and set about!  It was pretty simple. I used one white cake mix, seperated into 5 equal bowls and colored.  I then baked one color at a time in a 9" cake pan.  It took about 11 minutes per layer.  I used butter cream frosting!


Next time, I will use more than one mix to make the layers a bit thicker.  I felt it had a little to much frosting.  But other than that I am happy.... but most importantly of all.... she was happy!

Saturday, April 7, 2012

Easter Crafting

I am in the mood to be creative, and what better time than spring and Easter to do some fun stuff!

First I made my centerpiece for the buffet table. The best part was that the whole things was made with stuff I already had around the house!


I especially love the cat grass and mini daffodils...  The little vases are actually votive candle holders that I topped with some scrapbook ribbon. 

My second project today was bunny cookies! I saw these really cute cookies on Pinterest, from a blog called  "It's written on the wall". I was told by my niece that mine look like mice, but I'm ok with that!


Super yummy! I used a small egg cookie cutter and royal icing...... 

More to come!!

Sunday, April 1, 2012

Quaker Oatmeal Squares

I have a new Buzzagent product!

Quaker Oatmeal Squares


We all know that cereal is a great way to start the day, but for me, it's all about the snacks!  I am busy, and need a snack that I can not only feel good about eating, but is tasty too!  

I literally got out of the box when I combined the tasty honey nut squares with peanuts and dried apricots.  This is a salty, sweet, crunchy and totally nutrition packed snack that get's me through the most hectic of days!

One serving is packed with 46 grams of whole grains, 5 grams of dietary fiber, and 6 grams of protein.  That is pretty amazing in something that tastes so good.

Friday, March 30, 2012

Natural dyed Easter eggs..

I am seeing a lot of posts on dying Easter eggs with natural dyes apposed to the artificial dyes sold in the stores.  As I was reading I realized that I already knew how to make the most beautiful maroon colored eggs using onion peels and have been doing it for years now!

Way back in my college days I spent a couple of Easters with my bff Susan and her family.  Her mom would make these amazing eggs by boiling them with onion peels.  I was truly awe struck at the simplicity of the technique, yet the complexity of the color that was created.  Years later I started making them myself and have worked out a system that works pretty good.

It all starts for me the week after Easter when I start to save my egg skins.  Now, I have read that you can get color variations by using different colored skins, like keeping the red skins separate from the yellow. But I like just putting them all together.  I store them in a gallon size zip top bag left open in my pantry.  Every time I  get an onion out to cook with, I save the skin.  I leave the bag open so that if any of the peels have moisture on them, I won't get mold.  By the next year I have a pretty full bag and am ready to make the dye.


In a medium size pot I put about 1/2 cup of vinegar, the bag of peels and enough water to cover.  Boil over medium heat for about 30 to 45 minutes. Then cover and cool.


Once cooled you will have this amber colored dye to use on eggs, or just about anything I would imagine.  

I poured my dye back in the pot and stored it in the fridge until I was ready to color my eggs.  

Once ready, place the eggs in the pot and boil. If you do not have enough dye to cover the amount of eggs you are coloring, you can add more water. Boil as you would normally do to cook an egg, but watch for the color change. If you want to get a darker color, try leaving the eggs in the dye once cooked.


If you notice the color variation I have, it is because I left some skins in the pot. I happen to like them rustic looking. However, if you want to go for a more solid color, strain the dye of all the skins before you boil.

Another style I have seen is to take small greenery and stick it to the eggs before dying. You can also use a white crayon, wax, or stickers even to achieve the same effect. 

As a side bonus, the eggs seem to pick up an onionish taste from the dye.  I love them!

Happy dying!